Automatic Mesh Generator in Unreal Engine 5
Unreal Engine 5 is a powerful tool that allows developers to create stunning 3D environments and interactive experiences. One of the latest features introduced in the engine is the Geometry Scripting plugin, which allows users to create custom geometry in real-time using Blueprint, a powerful tool to write code with visual nodes. In this Tutorial we will take a look at how to generate an Automatic mesh based on a height map image.
Best of all, we're offering the tool as a free download! Simply click here to get started!
Step 1: Activate the Geometry Scripting Plugin
Before we can get started with generating automatic meshes, we need to activate the Geometry Scripting plugin. To do this, go to the "Plugins" menu in the Unreal Engine editor and search for "Geometry Scripting". Make sure that the plugin is activated.

Step 2: Create a Blueprint
The next step is to create a Blueprint from the Generated Dynamic Mesh Actor. To do this, select "File" > "New Blueprint" from the editor menu. Choose the "Actor" class, and make sure that "Generated Dynamic Mesh Actor" is selected as the parent class.

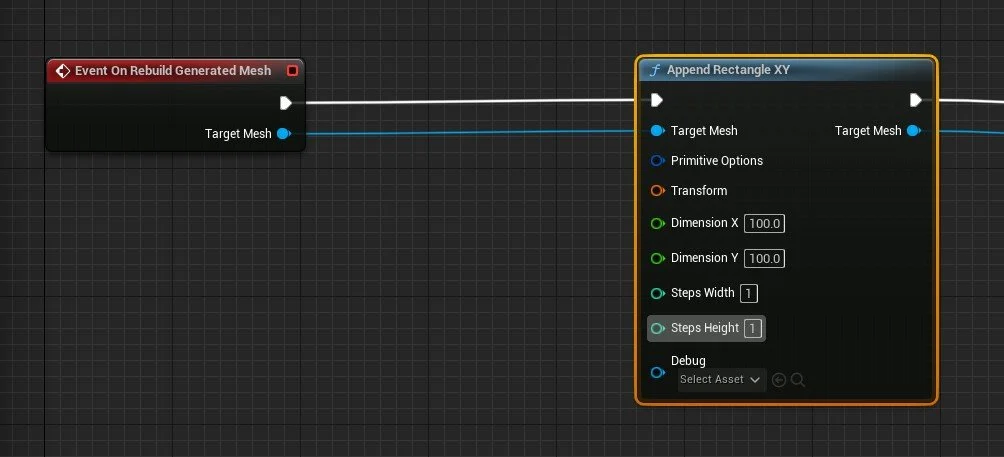
Step 3: Append a Rectangle
With the Blueprint created, it's time to start adding geometry. To begin, add the node called “Append Rectangle XY” to the Blueprint. This will serve as the base mesh for our automatic mesh generator. Remember you need to create the Event “On Rebuild Generated Mesh”
Step 4: Add Subdivisions
Next, we'll add some subdivisions to the mesh to increase the detail. To do this, select the same node and increase the “Steps Width” and “Steps Height” to 10.

Step 5: Add Tessellation
To further increase the detail of the mesh, we'll add tessellation. Create the node “Apply PNTessellation” and expose the variable to control the subdivisions.

Step 6: Displace the Geometry from a Height Map
Now it's time to use our height map to displace the geometry. To do this, add the "Apply Displace from Texture Map" node to the Blueprint's event graph. Connect the node to the "Target Mesh" node, and connect the height map texture to the "Texture Map" input on the node.

Step 7: Add a Mirror
To make our mesh symmetrical, we'll add a mirror. Add the "Mirror" node to the Blueprint's event graph, and connect it to the "Target Mesh" node. Adjust the Mirror Frame Location by exposing the variable.

Step 8: Smooth the Mesh
To make our mesh look more natural, we'll smooth it using the "Iterative Smoothing to Mesh" node. Add the node to the Blueprint's event graph, and connect it to the "Target Mesh" node. You can expose the variable to have more control over the smooth iterations.

Step 9: Recompute Normals
To make sure that our mesh has nice lighting, we'll use the "Recompute Normals" node. Add the node to the Blueprint's event graph, and connect it to the "Target Mesh" node.

Step 10: Create a Mesh
Finally, we'll create a mesh using the "Copy Mesh to Static Mesh" node. You can create a function that can be called from the Editor, grab the Dynamic Mesh Component variable and use the node to create a new static mesh.

Conclusion
In this blog post, we've explored how to use Unreal Engine's Geometry Scripting tools to generate automatic meshes based on height map textures. By following the steps outlined above, you can create stunning 3D.
Want to watch the full tutorial? You can follow the same steps here!