Cleaning Up 3D Scan Assets from Sketchfab in Unreal Engine 5: A Comprehensive Guide
3D scan assets are an essential part of modern game development, film production, and architectural visualization. Sketchfab, a leading 3D asset platform, offers a wide variety of high-quality 3D models. However, not all assets are perfectly optimized for use in game engines such as Unreal Engine 5 (UE5). This blog post will guide you through the process of cleaning up 3D scan assets from Sketchfab and optimizing them for use in UE5. Follow the steps below to create a cleaner, more efficient mesh that works seamlessly in your UE5 projects.
Step 1: Download the Asset from Sketchfab
Begin by browsing Sketchfab's extensive library of 3D assets and select the one you'd like to use in your project. Download the asset to your computer, ensuring that you have the appropriate file formats and permissions for use in Unreal Engine 5. In our case we will download this model.
Step 2: Import the Asset to Unreal Engine 5
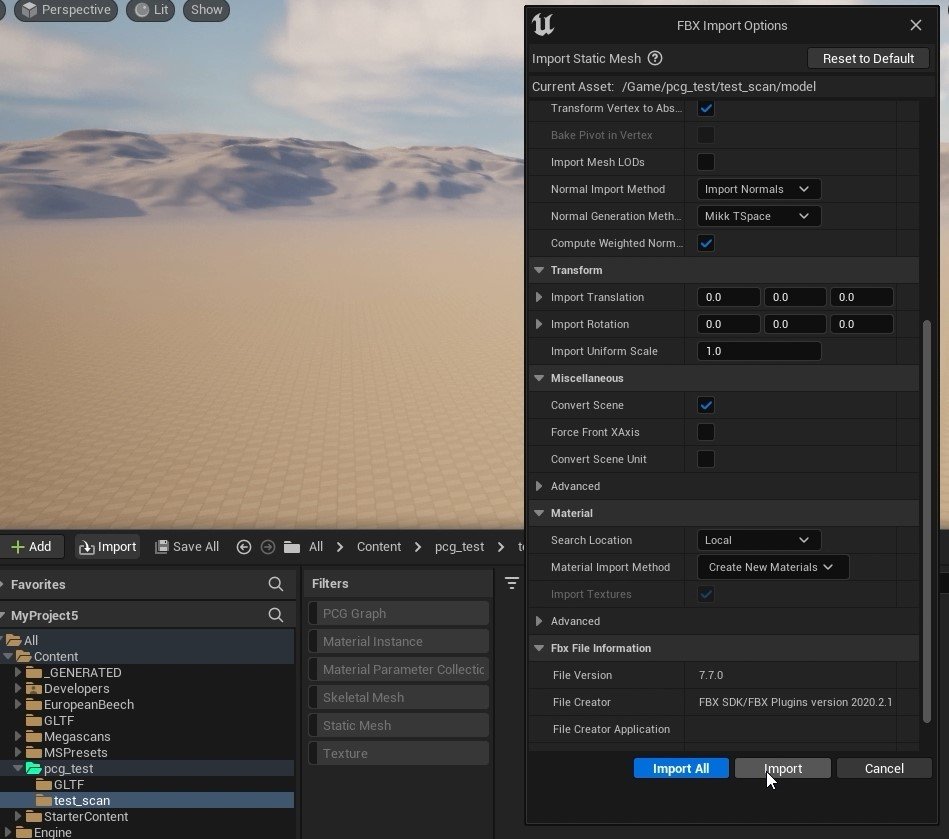
Launch Unreal Engine 5 and create a new project or open an existing one. Navigate to the Content Browser and click on the Import button. Locate the downloaded asset and import it into your project. UE5 will automatically generate materials and textures for the asset.
Step 3: Fix the Transform and Bake the Rotation and Scale
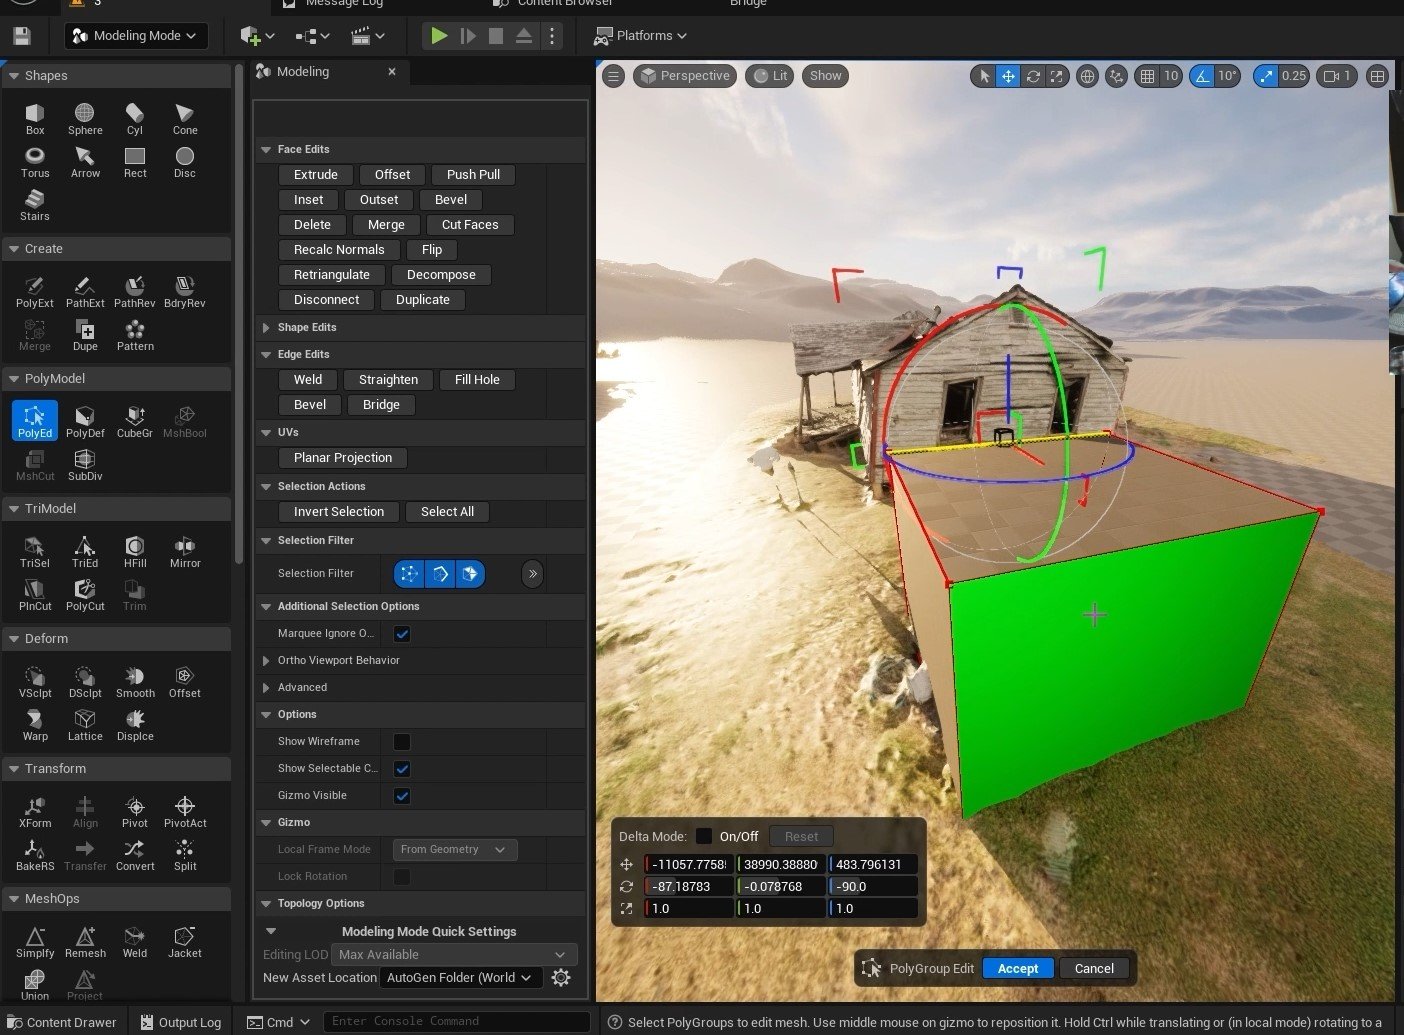
After importing the asset, you may notice issues with its position, rotation, and scale. To fix these issues, select the asset in the viewport and open the Details panel. Adjust the Transform settings to align the asset correctly within your scene. Once you've made the necessary changes, open the Modeling Tools and select the option BakeRS inside the Transform panel. This will apply the new rotation and scale permanently.
Step 4: Use Booleans to Create a New Mesh
Sometimes, 3D scan assets may contain unnecessary geometry or overlapping meshes that can hinder performance. To clean up the asset, use the powerful Boolean tools in UE5 to subtract or intersect meshes, removing unwanted geometry and creating a cleaner mesh. Navigate to the Modeling Tools Editor Mode and select the Boolean operation you'd like to perform. Apply the operation to the asset and review the results.
Step 5: Adjust the Pivot Point Position
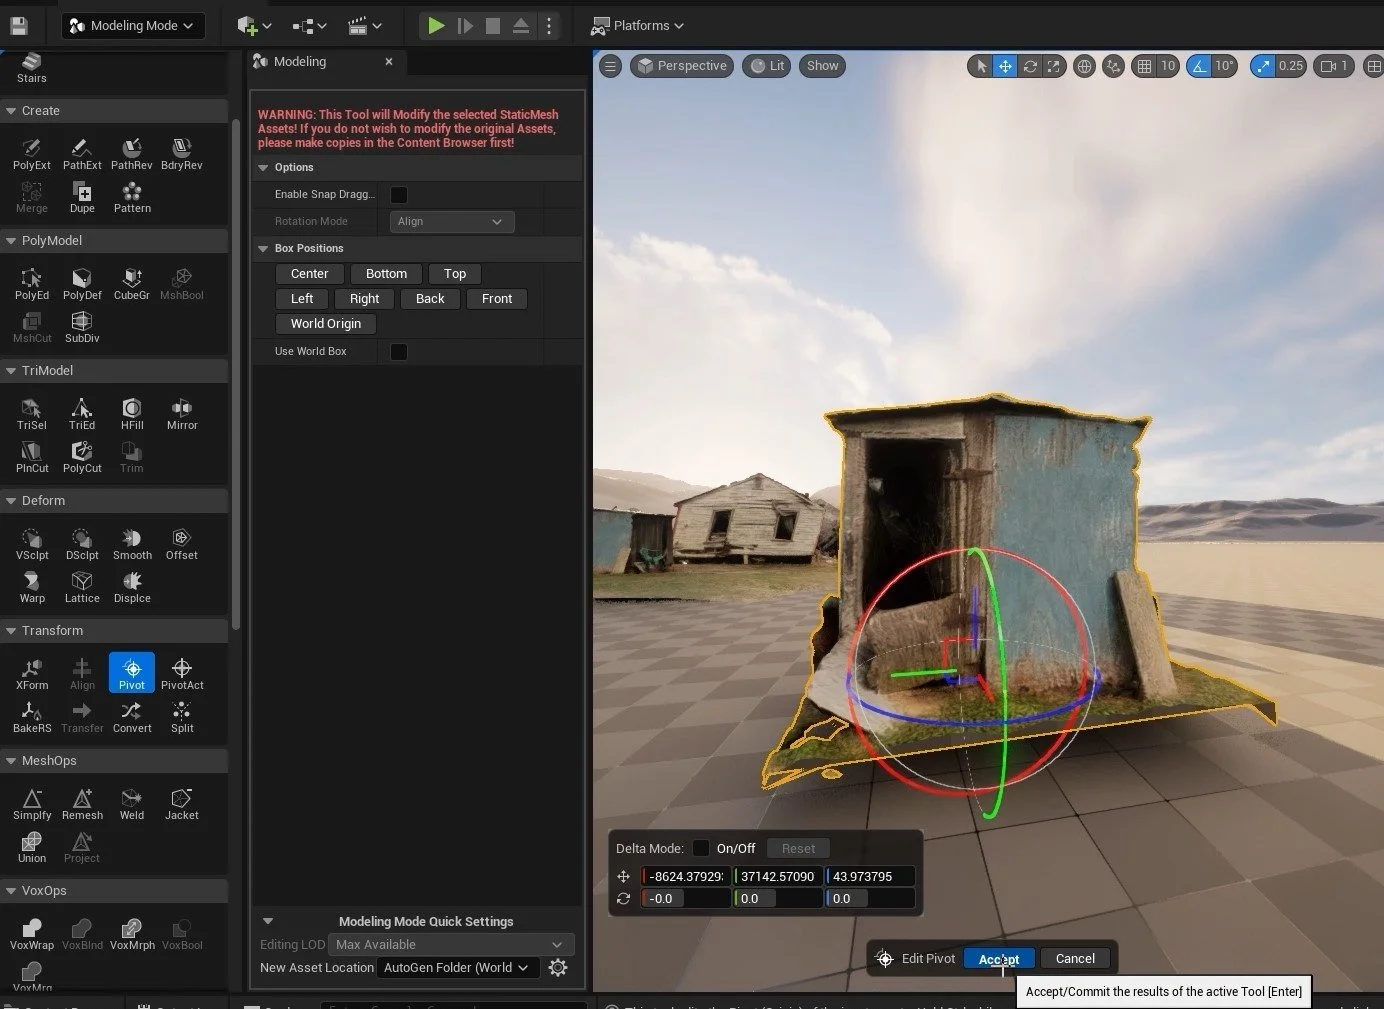
The pivot point of a 3D model plays a crucial role in determining how the asset behaves when moved, rotated, or scaled in the engine. To adjust the pivot point, use the Pivot tool in the Transform panel inside Modeling Tools Editor Mode. Move the pivot point to a more suitable location, such as the base of an object or its center of mass, and bake the new pivot point by clicking “Accept”.
Step 6: Fix Normals to Achieve Better Lighting
Normals are essential for determining how light interacts with a 3D model's surface. If the normals on your asset are incorrect or inconsistent, the lighting in your scene may appear unnatural. To fix the normals, select the asset and navigate to the Modeling Tools Editor Mode. Sketchfab assets may come with unwanted normals. Use the Normals tools to recalculate and smooth normals, ensuring that the lighting on your asset appears consistent and accurate.
Conclusion
Cleaning up 3D scan assets from Sketchfab is a crucial step in optimizing them for use in Unreal Engine 5. By following the steps outlined in this guide, you can create cleaner, more efficient meshes that work seamlessly in your projects. Whether you're a game developer, VFX artist, or architect, investing time in optimizing your 3D assets will ultimately lead to better performance and higher-quality visuals in your UE5 creations.
Want to watch the complete tutorial?
Here is the video where we cover all the steps for the tutorial:


